New York City has incomparable energy, and that energy doubles when fashion week rolls around. The city that never sleeps invites fashion enthusiasts, talented designers, models, and stylists to make NYC their personal runway. And here atBest Knockoff Luxury Clothing , we give our readers front-row seats and backstage passes to the madness—you're welcome. This time around, we partnered with Sally Beauty and hair expert Gregory Patterson, who created two classic hairstyles on our senior editor Anna LaPlaca. These styles can take you from day to night during fashion week and any other event on your calendar. If you want a step-by-step process of how to achieve a boss blowout and a power pony, along with some pro tips from a celebrity stylist, just keep scrolling.
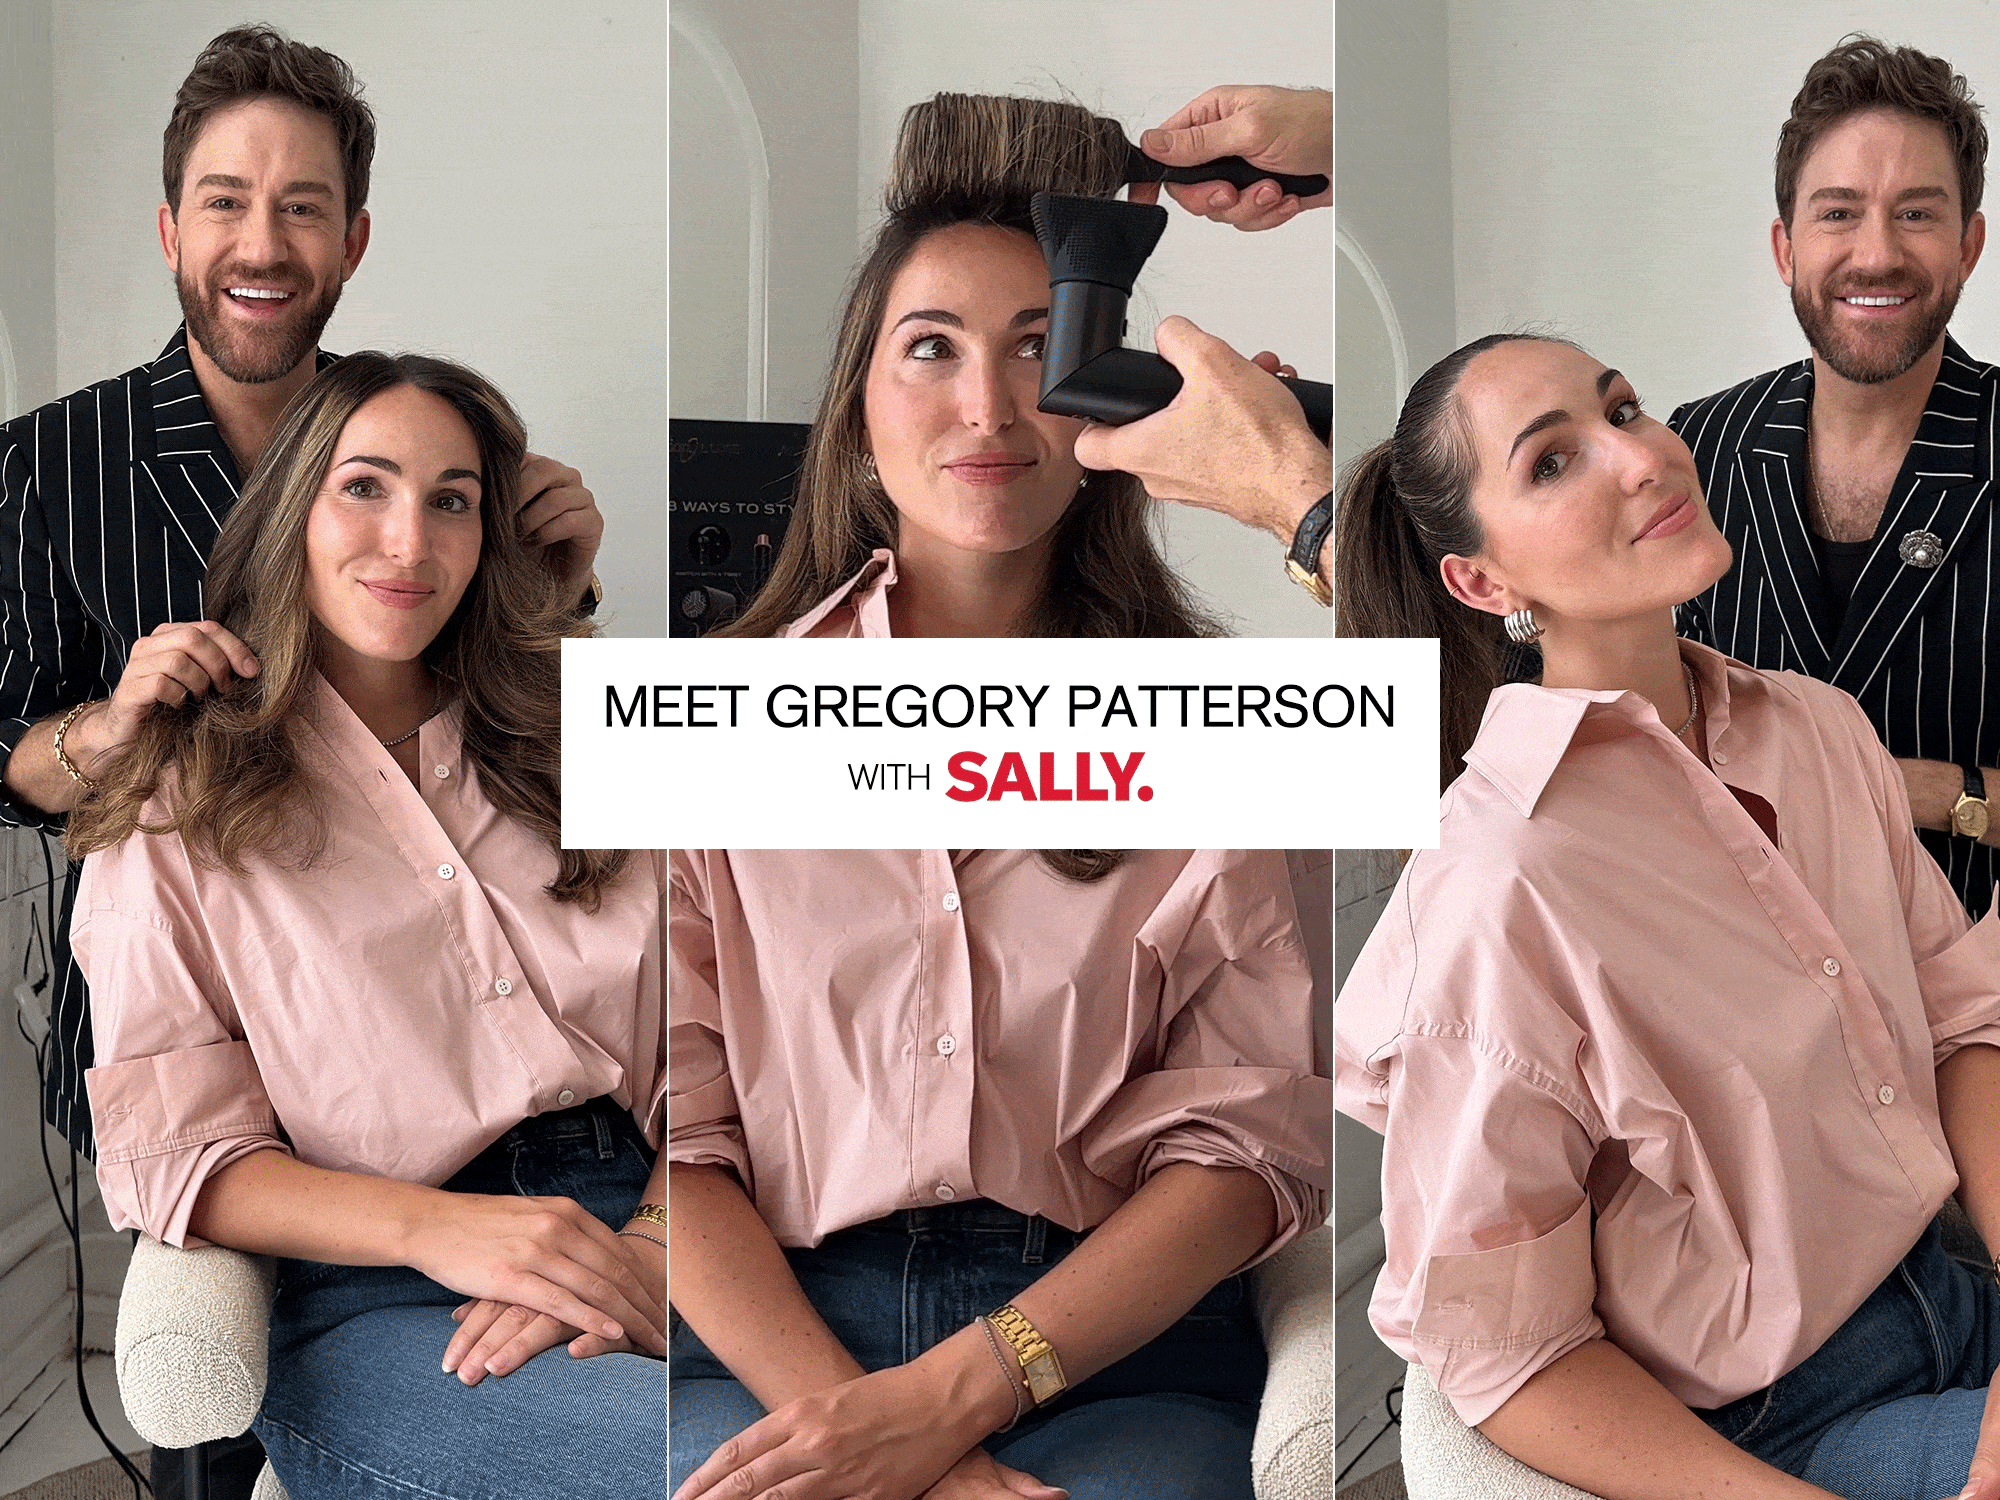
"I am Gregory Patterson, celebrity hair stylist and expert with Sally Beauty. My job is pretty cool, and not one day is typical to the next. From providing expert commentary, to testing products, consulting, and serving as an ambassador to help bring everything from photo shoots to events to life, that's what I do all in a 'day.' It's a pretty magical gig, no? I wanted freedom and creative variety in my career, and I have curated that perfectly. I cannot think of any other job that rewards my soul so richly as being a hairdresser and a brand ambassador."
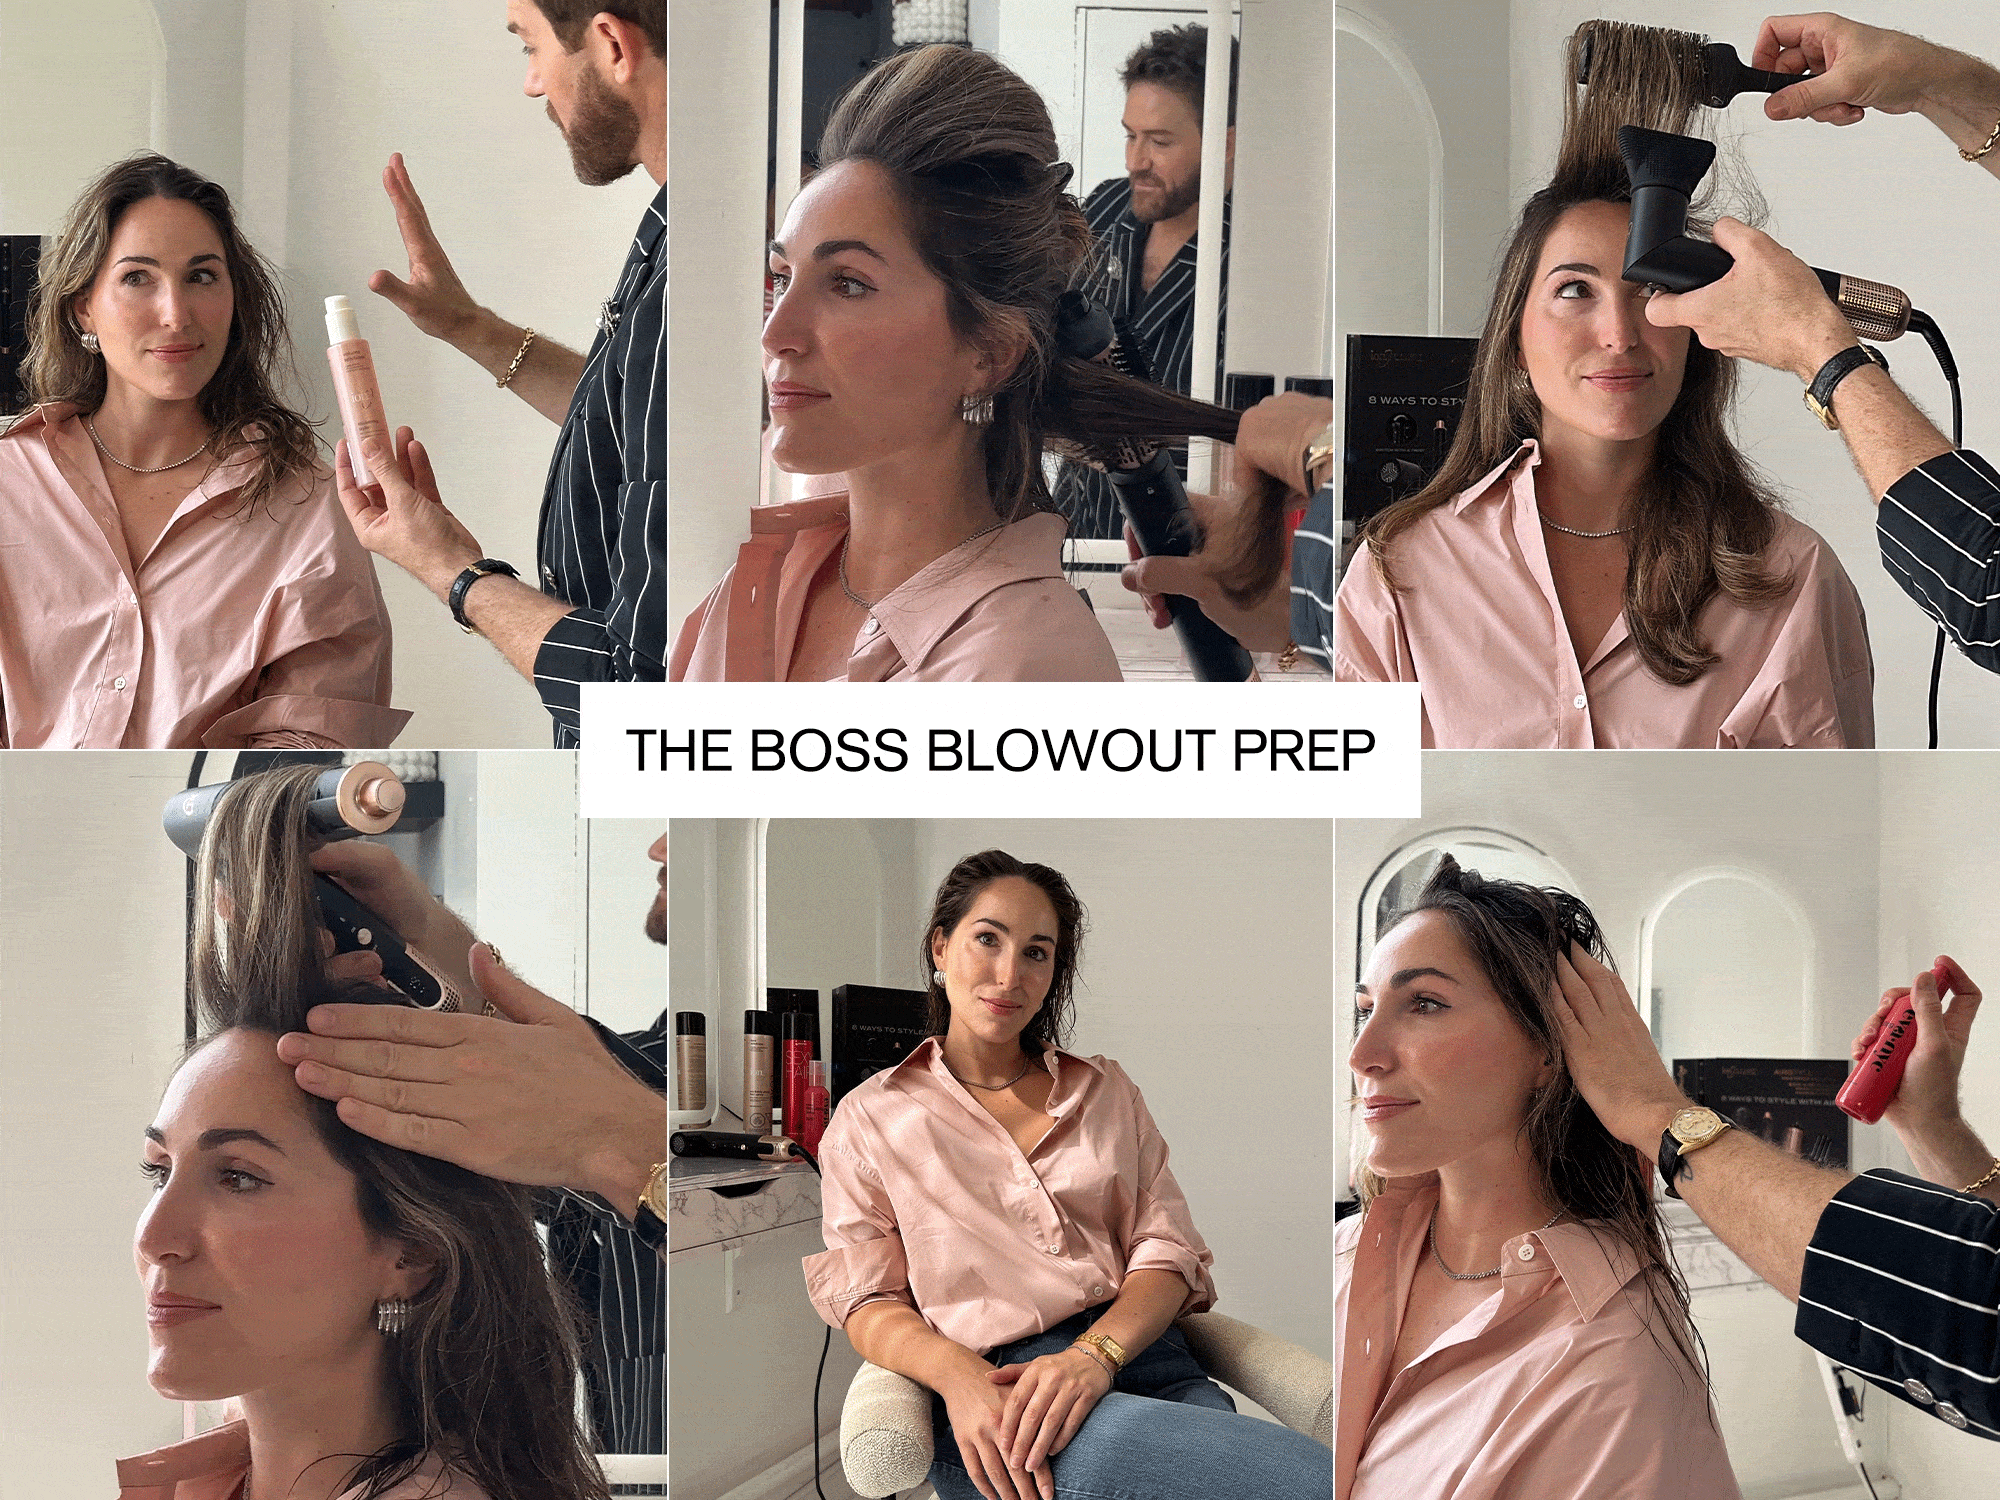
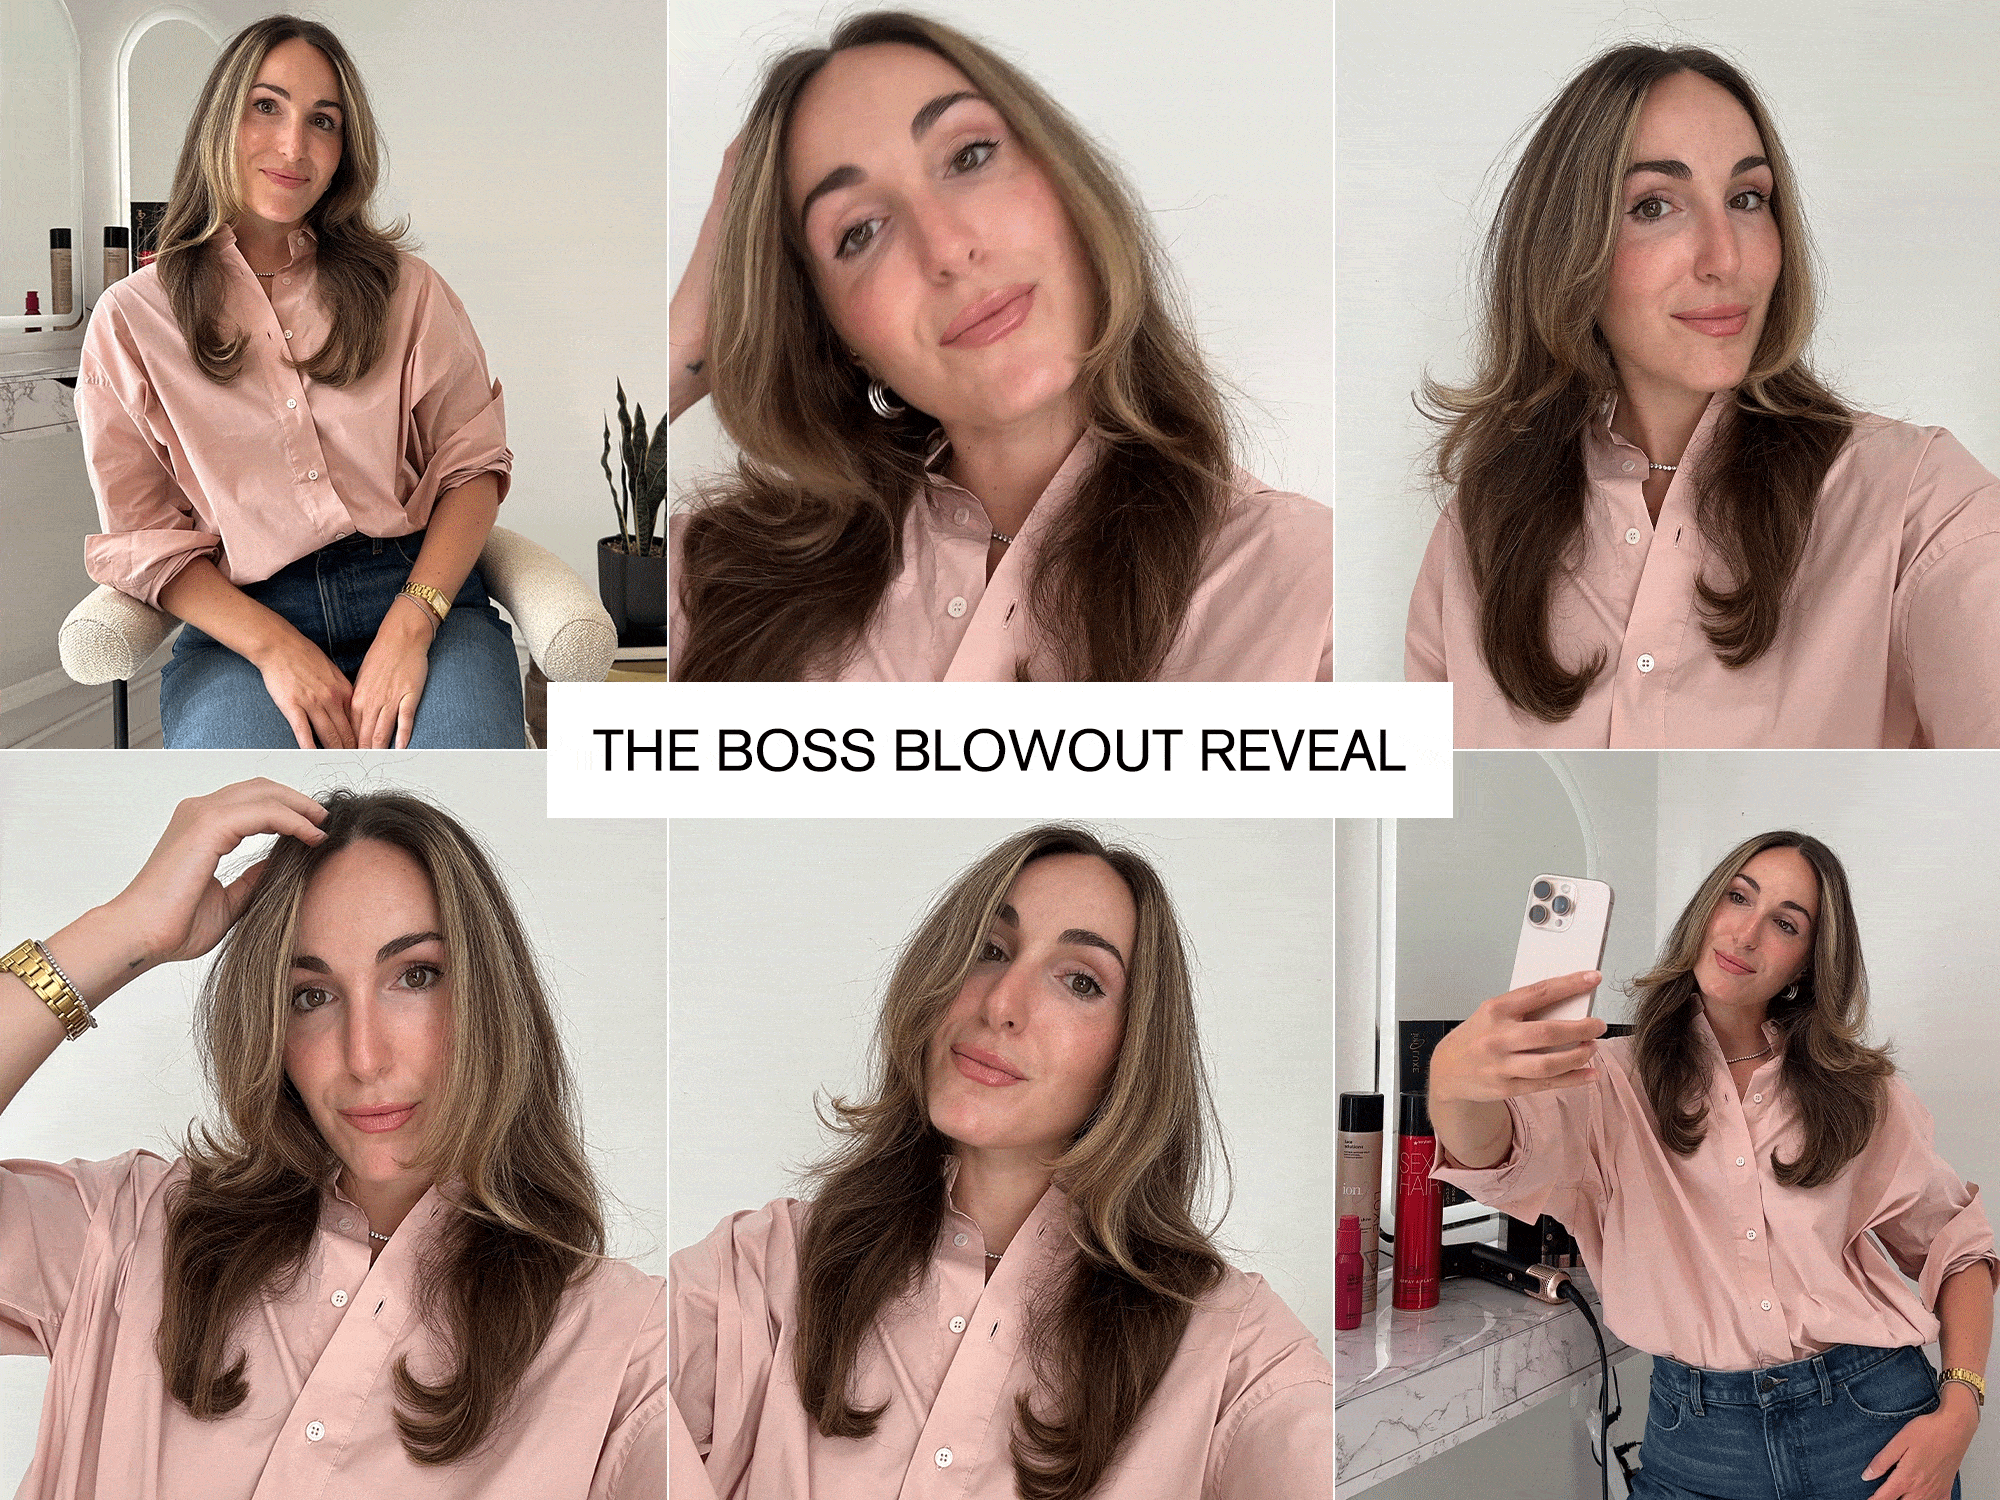
1. Cleanse
"Your best blow-dry actually starts in the shower. It's so important to give your hair a proper cleanse (double cleanse to be exact—one to clean and one to allow your hair and scalp to receive the goodies on the ingredient list) and nourish in the shower. Choose a cleansing and nourishing duo that speaks to the look you want to create that day. If you want volume, use a volume collection. If you desire smooth and sleek, grab that collection while you're in the shower, because your style support really does begin in the shower."
2. Prep
"Properly and effectively prepping your hair for your blow-dry look is often the most overlooked part of the whole blow-dry. This is where the science of the blow-dry that lasts happens, and is one of the most essential parts of the blow-dry process. While your hair is wet or damp, apply your products. If volume is what you're after, use a root-lifting spray at the roots, mousse, or a thickening serum [from] roots to ends, and a hydrating and ends-sealing serum to protect and hydrate weakened ends. Most volume products require heat to activate and 'puff up,' so if you're applying these products and letting your hair air dry… you're losing the game of volume. You have to utilize the heat of the dryer with your products to support your style and allow your hair to stretch, bend, wrap, and reshape as it's warm. Then allow it to cool to reform and retain that shape in the cool-down phase. Yes, this actually is scientifically a thing for hair to last."
3. Style
"Now it's time to style. Choose the right tool for the job. Look for multi-use tools that allow you to blow-dry, smooth, shape, or curl, because we love options, right? For Anna's blow-dry, we chose to pre-dry with the dryer function of the Ion Luxe 8-in-1 Airstyler Pro. After the pre-dry, where we focused our airflow at the roots for lifting, we switched to the round-brush attachment. Using the brush attachment to smooth larger sections, we not only begin to build in the bend to her hair, [but] we are also reducing drying time, all while increasing the volume of her hair. Next, we swapped out the brush attachment for the curling attachment in the larger of the two sizes available. Make sure to keep some moisture in the hair after [using] the brush attachment—the key here is to allow the curling rod attachment to complete the drying but [also] go around this round shape. Allow the hair to wrap around the rod and complete its drying around this shape, and then blast it cold with the cool-shot function because science! Allowing this shape to heat up and form before freezing it into that shape will guarantee a longer-lasting curl, blow-dry, and style."
4. Finish
"The finish is just as essential as the prep. This is where the look comes to life, and you make it last—the products come in to support the style. I always love to finish with a soft and crushable working hairspray, a serum or cream to polish and smooth any unruly ends, and maybe a texture spray of sorts, depending on the look desired. I may opt for a salt-free wave spray for curl memory or a dry texture spray for that lived-in, second-day hair like Anna loves."


Do you have any pro tips for creating each look at home?
Gregory Patterson: Please section off your hair. Your style is so much easier to achieve when you divide your hair to conquer your hair. I've been doing this for almost 24 years now, and if I don't section, I feel overwhelmed. Sectioning your hair also just helps you move through each section with more ease, and your end result is so much better because each section was able to get the same kind of love.
What advice would you give to someone who struggles with volume?
GP: Product, product, product, and tackling the "lifting" when it's mostly damp with a hair dryer. Volumizing products require the addition of heat to activate the plumping polymers—use your hair dryer! The second most important rule for hair volume is the cool down. (Set it and forget it all.) If your hair doesn’t have the 10-15 minutes needed for the bonds to relink and harden in that new shape, it's all over. This is purely science, and it's what separates the flat hairs from the closer to GAWD hairs. Let 'em cook.
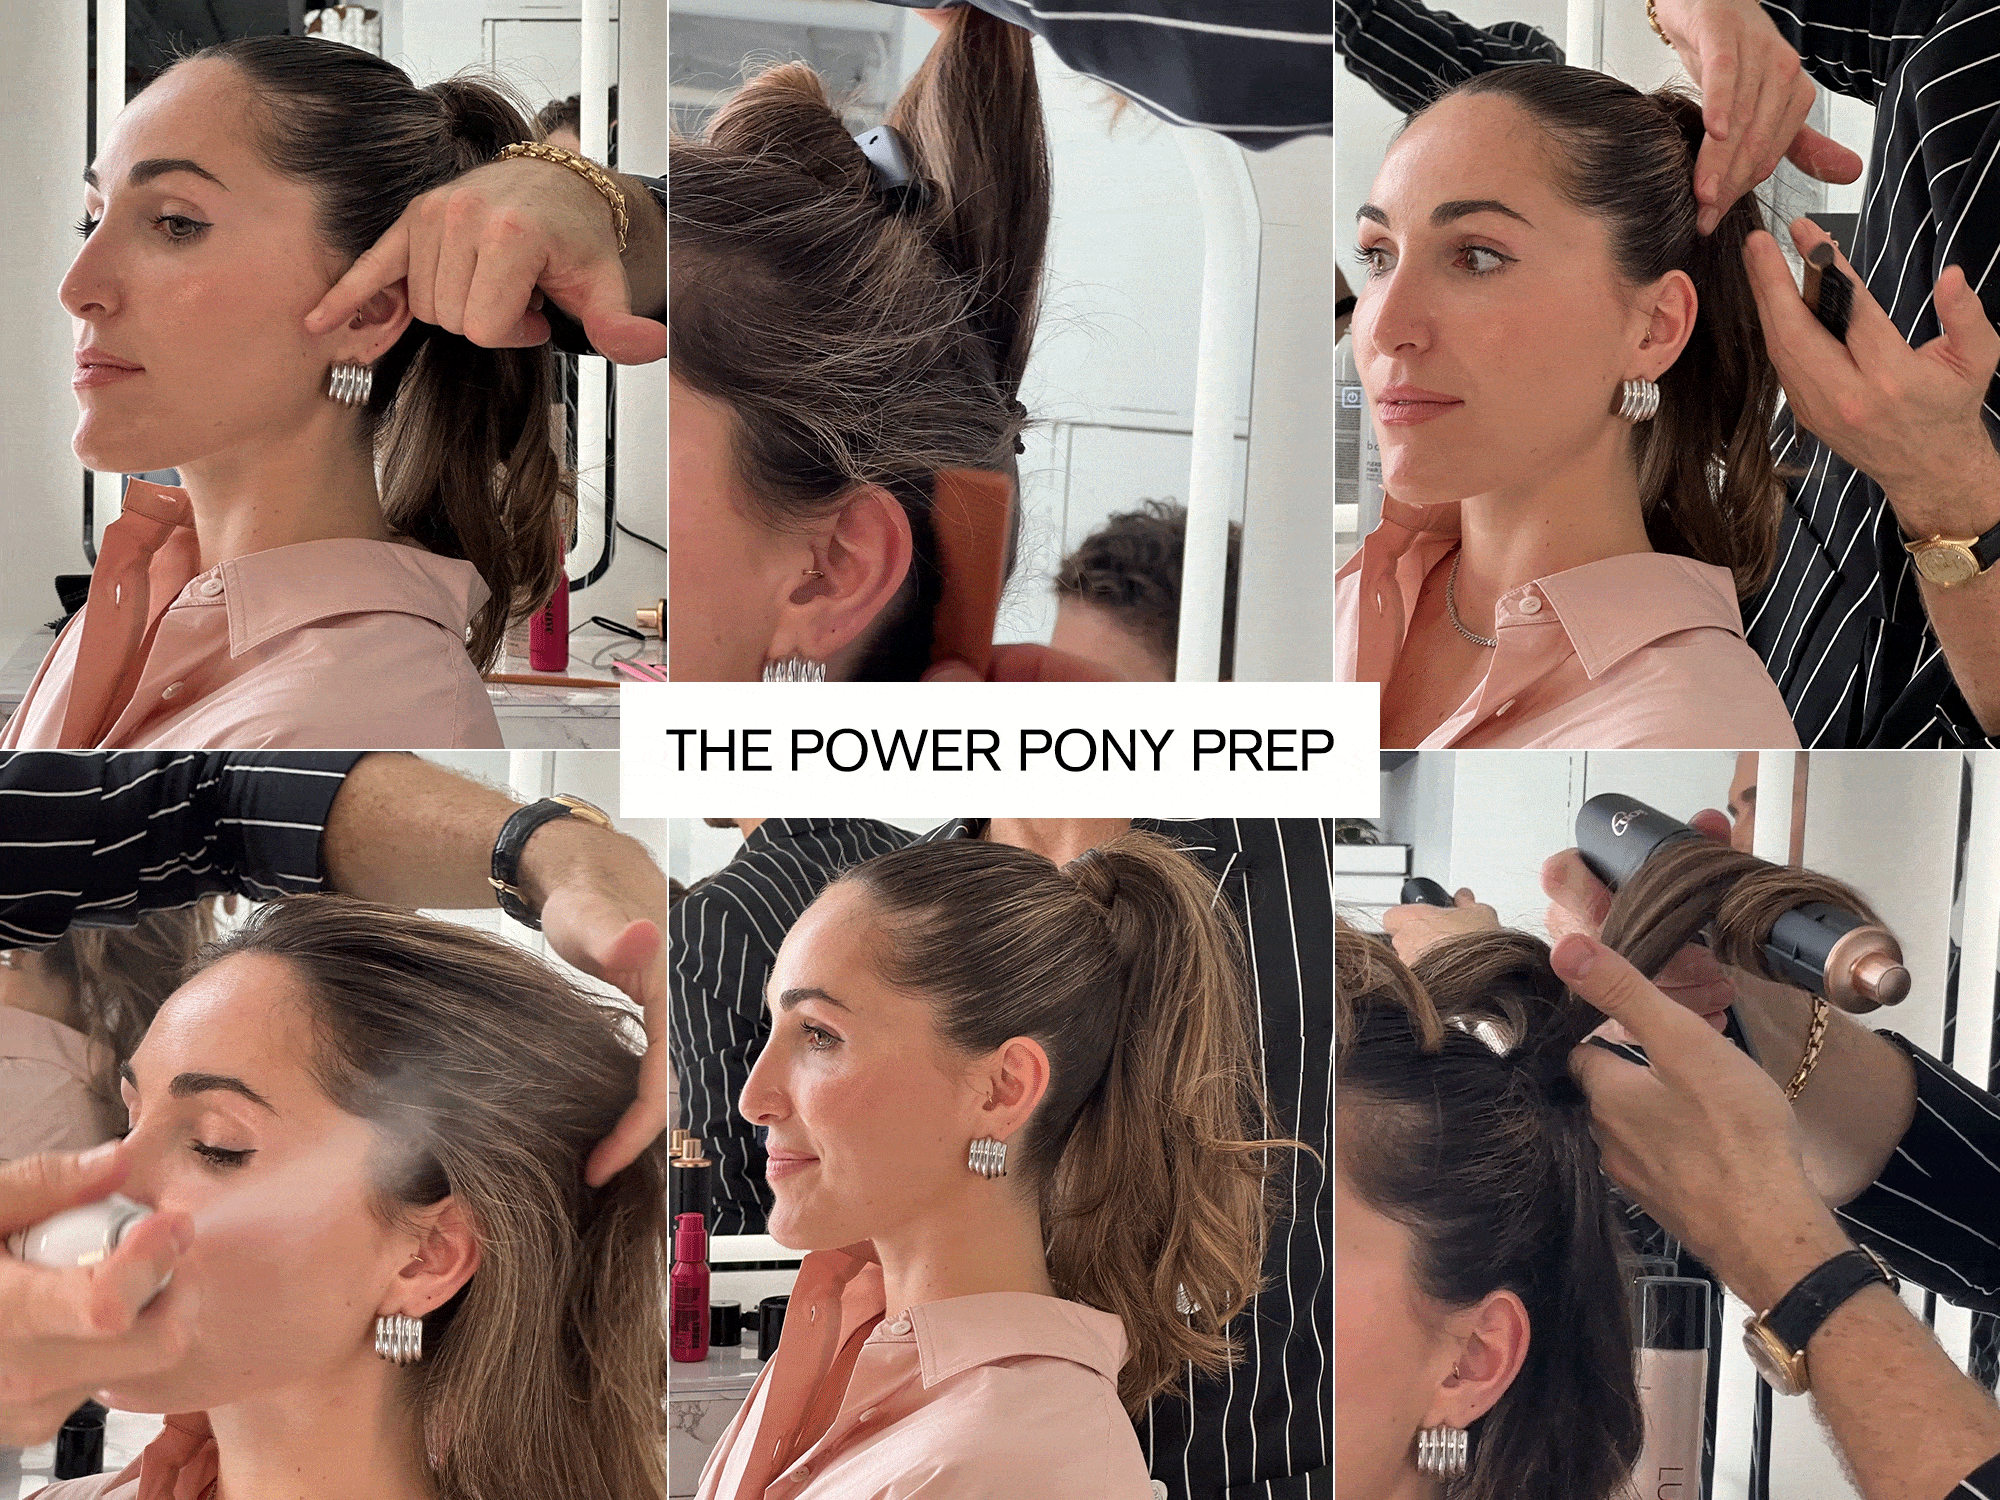
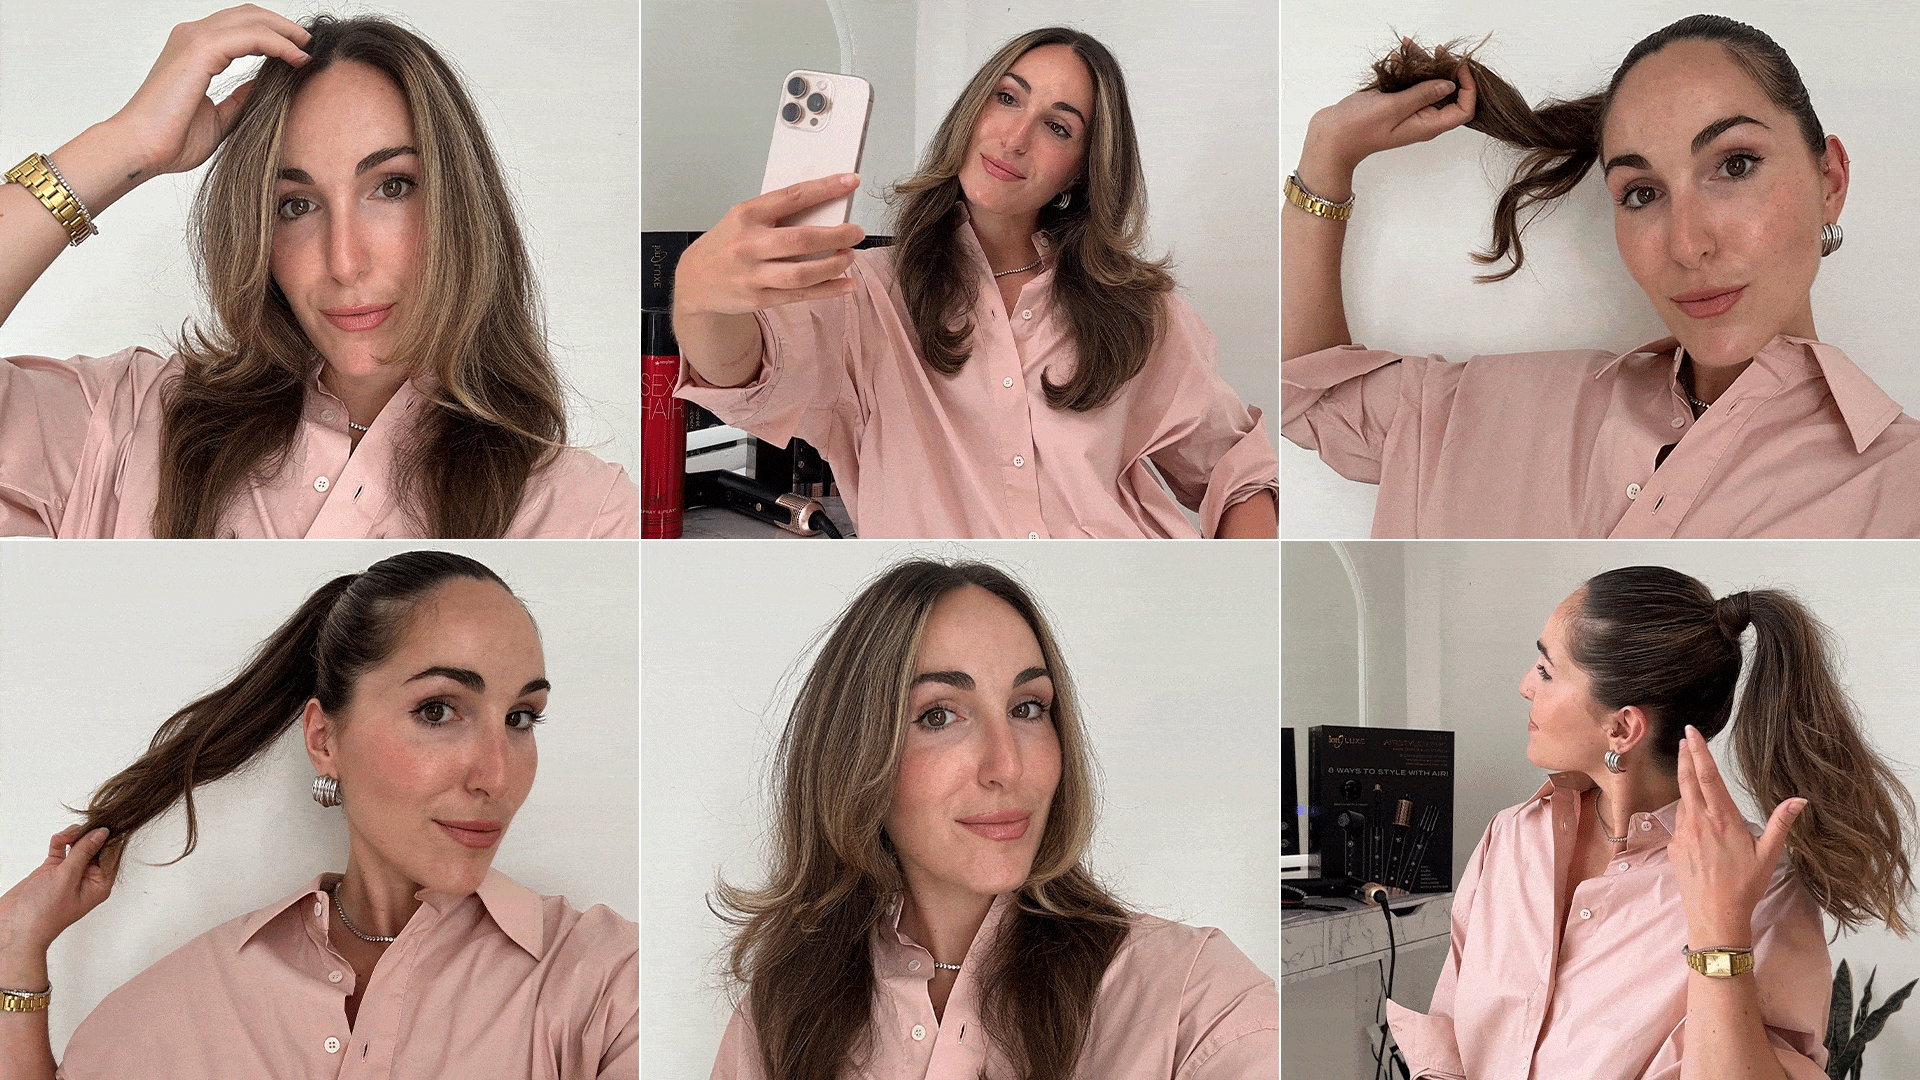
1. Build the Bottom
"Divide to conquer a perfect ponytail. I like to divide the hair into two sections—a top section and a bottom section. To divide the sections, place a tail comb at the front top of your ear, following the line of your cheekbones upward in a diagonal line, and section heading towards the crown of your head. Secure this section away using a large clip. We use the cheekbones as a guideline because they're a universally flattering line to follow on each individual face shape. Following this line will lead to creating the most flattering-looking ponytail. Once all of your hair is gathered into this position and all lumps and bumps have been smoothed, we will secure that section using a hair bungee. Make your own DIY hair bungee by attaching two bobby pins opposite one another on an elastic hair band. If your baby hair and hairline hair aren't perfectly coiffed into the ponytail, it's okay, we will detail this after securing the top section to put that professional polish and finish to your ponytail."
2. Build the Top
"Now that the bottom part of your ponytail is positioned where you want it and secured, it's time to join the top section to the bottom. (This is the easy part!) Spraying your roots section by section with the previously used working hairspray and sub-sectioning to ensure that all of the roots have product on them, brush your hair up and back towards the secured section. It helps to hold your non-brush hand steady at the point where you want your ponytail to land—try not to move this hand too much because doing so will push your ponytail off the position that you desire. Once all of your hair is smoothed, directed, and in your hand with both sections, wrap the two sections together to form one ponytail and secure with another hair bungee. You should now have one ponytail nicely secured and positioned along the flattering lines of your cheekbones, landing somewhere in the center zone of your crown."
3. Polish and Perfect
"This is where your ponytail comes to life and gets that 'snatched finish.' Whenever you're detailing your hairline and refining unruly hair or baby hairs, always brush them in the direction towards the zone where your ponytail is positioned. Once you've detailed your edges, cover your hair bungee, taking a section of hair from underneath your ponytail in a section about the same width as the exposed bungees. You want enough hair to cover the bungees when you wrap the hair around them. I like to spray the wrapping section with hairspray as I wrap for additional control and security, and secure the section using a hairpin at the base of your ponytail. Make sure to tuck those ends away!
To finish your ponytail, use a more firm holding spray for security and an oil or finishing cream to lock in your style and enhance the glass-like shine effect. (I used the Eva NYC On Point Split End Mender and the Bondbar Flexible Hair Spray). Fluff your ponytail with a soft-back brush to enhance any created or natural wave movement for volume, or smooth with a styling iron for a more sleek ponytail effect."


As a celebrity hairstylist, what hairstyles do you typically see during fashion week?
GP: Ponytail ponytail, ponytail—especially at fashion week. From the designers requesting the ponytail on the runway, to the front row and into the street style shots, we see on social media, the fashion week ponytail is a staple. That look carries from show to show, stays chic throughout the day of running to events, and brings you right to your evening table for dinner and drinks after the shows. It will never not be a chic go-to look."
What is the biggest hair mistake that people make when styling?
GP: Not using the right products for your hair type and texture (and this includes where your hair is at now). Team up with your stylist to discover your hair type and texture, and whether your hair is high porosity or low, needs protein, moisture, or maybe both. And remember, just because "that" product works miracles for a friend, it may not be your unique hair type and texture's miracle maker. Knowing your hair type, texture, and needs is major when it comes to achieving any and most all hairstyles.


